前回の記事で基本的なことは書いたので、次は模倣。いくつかのサイトにある、実際に使われているボタンに似たものを作ってみます。
実際に使うかどうかは別として、cssの練習にはこういうのが良いんじゃないでしょうか。
基本的に、以下のaタグのみのごく簡単なhtmlを使って作っていきます。クラス名や中の言葉は変わっていきます。いろいろ察してください。
<a href="#" class="btn">ボタン</a>
また、いつものことですが、使っているテーマなどによっては、そちらのcssが優先されてここでの指定がきかない場合もあります。!important付ければ大抵なんとかなりますが、あまり美しくはないですね。
ではでは、いってみましょー。
- Amazon(サインイン)
- Amazon(アカウントを作成)
- はてなブログ(写真を投稿)
- はてなブログ(読者になる)
- ツイッター
- Apple(選択)
- Apple(ショッピングを続ける)
- XVIDEOS
- まとめ
INDEX
Amazon(サインイン)
元となるボタン
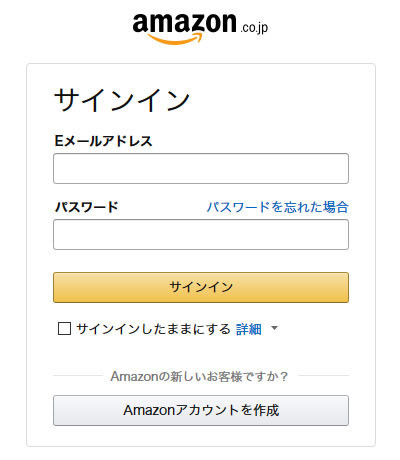
できたもの
css
.entry-content a.btn1{
display: inline-block;
width: 300px;
border: 1px solid #9c7e31;
border-top: 1px solid #a88734;
border-bottom: 1px solid #846a29;
border-radius: 3px;
background: linear-gradient(to bottom, #f7dea1, #f0c24d);
box-shadow: 0 1px 0 #faecc8 inset;
text-align: center;
color: #111;
font-size: 0.8em;
line-height: 1;
padding: 0.7em;
}
.entry-content a.btn1:hover{
background: linear-gradient(to bottom, #f5d689, #eeba35);
}
Amazon(アカウントを作成)
できたもの
css
.entry-content a.btn2{
display: inline-block;
width: 300px;
border: 1px solid #a2a6ac;
border-top: 1px solid #adb1b8;
border-bottom: 1px solid #8d9096;
border-radius: 3px;
background: linear-gradient(to bottom, #f6f7f9, #e7e9ec);
box-shadow: 0 1px 0 #fcfcfd inset;
text-align: center;
color: #111;
font-size: 0.8em;
line-height: 1;
padding: 0.7em;
}
.entry-content a.btn2:hover{
background: linear-gradient(to bottom, #e6e9ef, #d9dce1);
}
はてなブログ(写真を投稿)
元となるボタン
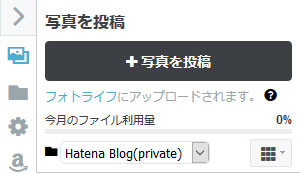
できたもの
css
.entry-content a.btn3{
display: inline-block;
width: 247px;
background: #3D3F44;
border-radius: 4px;
color: #fff;
font-size: 14px;
font-weight: bold;
text-align: center;
line-height: 1;
padding: 1em;
}
.entry-content a.btn3::before{
content: '\f001';
font-family: blogicon;
margin-right: 0.3em;
}
はてなブログ(読者になる)
元となるボタン

できたもの
css
.entry-content a.btn4{
display: inline-block;
background: #f5f5f5;
border: 1px solid #bbb;
border-radius: 3px;
color: #525252;
font-size: 10px;
font-weight: bold;
line-height: 14px;
padding: 0 .6em;
}
.entry-content a.btn4:hover{
color: #222;
}
.entry-content a.btn4::before{
content:'\f001';
font-family: blogicon;
font-size: 1.25em;
margin-right:0.3em;
}
ツイッター
元となるボタン

(それぞれの設定したテーマカラーにより色は異なります。)
できたもの
css
.entry-content a.btn5{
display: inline-block;
background: #009688;
border-radius: 23px;
color: #fff;
font-size: 15px;
font-weight: bold;
line-height: 1;
padding: 0.7em 1.2em;
opacity: 0.8;
}
.entry-content a.btn5:hover{
opacity: 1.0;
}
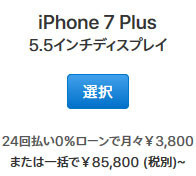
Apple(選択)
元となるボタン
できたもの
css
.entry-content a.btn6{
display: inline-block;
border:1px solid #07c;
border-radius: 3px;
background: linear-gradient(to bottom, #40a0ec, #07c);
color: #fff;
font-size: 14px;
font-weight: bold;
line-height: 1;
padding:0.7em 1em;
}
.entry-content a.btn6:hover{
opacity: 0.9;
}
Apple(ショッピングを続ける)
元となるボタン

できたもの
css
.entry-content a.btn7{
display: inline-block;
border: 1px solid #b5b5b5;
border-radius: 4px;
background: linear-gradient(to bottom, #fff, #ebebeb);
color: #0085cf;
font-size: 13px;
line-height: 1;
padding: 0.7em 1.2em;
}
.entry-content a.btn7::before{
content: '\f017';
font-family: blogicon;
font-size: 1.1em;
margin-right: 0.3em;
}
.entry-content a.btn7:hover{
border: 1px solid #999;
background: linear-gradient(to bottom, #fff, #d7d7d7);
box-shadow: 0 0 0 3px #bfddfc;
}
XVIDEOS
元となるボタン

できたもの
css
.entry-content a.btn8{
display: inline-block;
border:1px solid #d9d9d9;
border-bottom: 4px solid #d9d9d9;
border-radius: 2px;
background: #f2f2f2;
color: #000;
font-size: 12px;
font-weight: bold;
line-height: 1;
padding: 0.6em 1.1em;
box-shadow: 1px 1px 1px #bbb;
}
.entry-content a.btn8::before{
content: '\f037';
font-family: blogicon;
font-size: 1.2em;
margin-right: 0.3em;
}
.entry-content a.btn8:hover{
border: 1px solid #a11c00;
border-bottom: 4px solid #a11c00;
background: #de2600;
color: #fff;
text-shadow: 0 -1px #333;
}
まとめ
意外とシンプルなものばかりでしたね。Appleのマウスオーバー時にbox-shadowで周りに青い囲みができるのはちょっと面白かったです。
ちなみに、別に元サイトのソースを読んでいるわけではないので、どのボタンも実際は全く別の記述になっていると思います。同じような結果(見た目)でもいろんなアプローチの仕方があるのがcssの面白いところですね。


